.svg)

When people look for safe ways to keep food for a long time, Mylar bags are top selection. These bags are strong, flexible, and block air, light, and moisture.
Learning how to seal mylar bags for food storage is the key to keeping food fresh for many months and in some cases for years. With a little practice, you can build a pantry that feels ready for everyday cooking and for emergencies.
Sealing Mylar bags is not hard, however it does require care and patience. With the right tools and a simple process, you can store rice, beans, flour, pasta, oats, and other dry foods without worry.
This method gives families peace of mind, helps avoid waste, saves money, and keeps supplies ready when they are needed most.
Why Mylar Bags Work for Long Lasting Food Safety?
how to seal mylar bags for food storage and why these bags work so well. The reason is simple. Mylar forms a strong barrier that keeps out oxygen, moisture, and light.
These are the main causes of spoilage. The barrier also makes it harder for pests to reach the food. Once sealed, the bag creates a tight shield that locks in freshness, taste, and texture.
Families who want to prepare for emergencies, store bulk items, or cut down on shopping trips often select Mylar. Unlike thin plastic containers or loose bags, Mylar offers long term protection in a compact form.
It is lightweight, easy to label, and fits on shelves, in bins, or inside buckets. Because it is so reliable, many people use it as the base of a long term storage plan.
Tools You Need to Seal Mylar Bags
Before you start the process to seal mylar bags for food storage, gather a few simple tools. The first item is a heat sealer. This tool presses the bag shut with heat to create a firm, airtight seal.
If you do not own a heat sealer, a flat household iron can work as well. Put a smooth wooden board or a baking sheet under the edge of the bag so the seal is flat and even.
You also need oxygen absorbers. These small packets remove any remaining oxygen from inside the bag after sealing. That step matters because oxygen allows bugs to live and can make oils turn stale.
Choose the right size absorber for the bag volume and the type of food. A measuring scoop, a funnel, clean cloths, and a marker for labels will make the job neater and faster.
Step by Step Guide on How to Seal Mylar Bags for Food Storage
Now let us walk through step by step process to heat seal mylar bags for food storage. First, gather your dry foods such as rice, wheat, oats, beans, pasta, lentils, or flour. Check that the food is clean and fully dry.
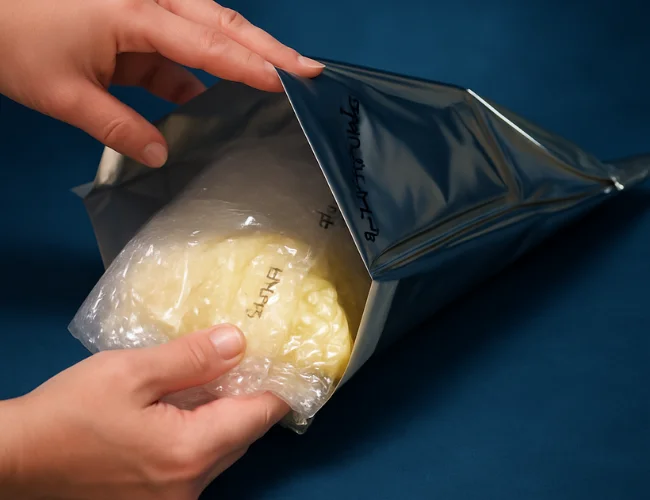
Fill the Mylar bag to about three quarters of its height. Leave space at the top so you can make a flat, solid seal. If the bag is too full, the seam will wrinkle and the seal may not hold.
Tap the bottom of the bag on the counter to settle the food. Smooth the sides so the top edge lies flat. Place an oxygen absorber on top of the food. Press out as much air as you can by hand. Use a heat sealer or an iron set to a medium setting.
Press across the open edge slowly and evenly. Aim for a straight seal that is about one half inch wide. Let the seam cool. Pinch along the length to feel for soft spots. If you find a gap, press again for a couple of seconds until the seam feels firm and uniform.
For very large bags, you can make a short starter seal on one side, then insert the absorber, push out air, and finish the seal from end to end.
Some people also place the filled Mylar bag inside a food grade bucket before sealing to help hold the shape while they work. Choose the method that lets you keep the top edge flat and under control.
Mistakes to Watch Out for During Sealing
A common mistake is overfilling the bag. When there is no room at the top, the seam waves and small leaks can form. Another mistake is rushing the seal. Moving too fast can leave tiny gaps you cannot see.
Air can slip through those gaps and slowly spoil the food. Picking up the wrong size oxygen absorber can also cause problems. If the absorber is too small, it will not remove enough oxygen.
If it is too large, it will not hurt the food, but you will waste money. Match the absorber size to the bag size and the food type. Avoid hot, humid rooms during sealing. Moist air can condense and shorten shelf life.
Smart Tips to Keep Food Safe for Longer Term
Label each bag as soon as it is sealed. Write the food name, the weight, and the date. You can also add a best by date based on storage charts from a trusted source.
Store the bags in a cool, dry, and dark place such as a closet, a pantry, or a basement shelf. Heat and light speed up spoilage. A steady, cool space helps the food last much longer.
For extra protection, put sealed Mylar bags inside food grade buckets or sturdy plastic bins. This shields them from pests, water, and sharp objects that might puncture a bag. Keep heavier items on lower shelves and lighter items higher up.
Why Choosing Mylar Bags Pays Off?
Sealing food well takes a little effort, but the results are worth it. Buying in bulk lowers the price per pound, and sealing in Mylar protects that value.
You gain peace of mind because you know your family has steady supplies for storms, busy weeks, or hard times. You also cut food waste because dry goods keep their quality for much longer.
Over time, you will see how much money and stress this simple system can save. With a clear plan and a tidy routine, you can keep a pantry which is reliable, clean, and ready whenever you need it.